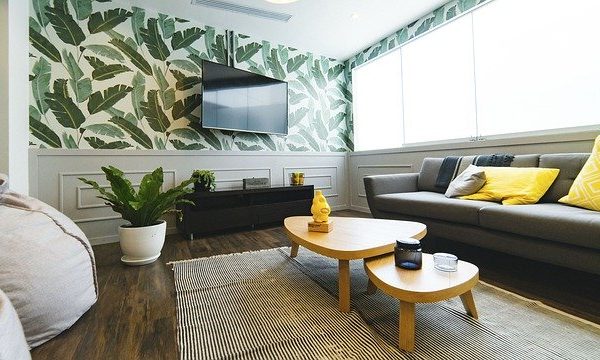
When I bought my home, there was one thing that drove me absolutely crazy! The walls were the most boring shade of yellow ever. There was no character to it at all. After spending 8 months looking for wainscoting, making stencils, and not finding anything I wanted–, I decided to go a different route.

I wanted wallpaper.
But I wanted a wallpaper that was removable. I couldn’t afford to tear out all the baseboards, wainscoting, and redo the walls. After hours of searching for “removable” wallpaper, I found it in peel & stick tile sheets!
The stuff is amazing…its super easy to install, comes off in seconds, and you can peel it right back off too! But it can be mind blowing if you don’t have the right information about wall preparations and the application of floral wallpapers. Check these tips to prepare the walls for floral peel and stick wallpapers.
Why peel and stick wallpapers?
Peel stick wallpapers are made to be applied to flat surfaces. They do not need messy paste that’s difficult to clean up afterwards because all you have to do is pull it right off the walls when you’re finished with it. Besides this ease of application, there are several other benefits of using peel and stick wallpapers. Here are some of them:
The peel and stick wallpaper is easily removable. This makes it easy to clean the walls before applying new wallpaper. If you want to redecorate again in a few months, all you have to do is pull off the old wallpaper–frame and all–and then put up some new designs.
You will not have any trouble matching patterns since you can easily line up the tiles so that they fit together. It equally gives you flexibility when it comes to design choices because you can experiment without worrying about cracks or lines showing if you don’t like your options. It’s very economical because there is no messy paste to buy and wallpaper pastes are expensive. Just go to a nearby store or check online and buy a roll of peel and stick tiles.
It’s easy to reposition the tiles if you don’t like where they are positioned on the wall. You just have tio pick up each tile gently, move it in the opposite direction that you want it moved, then lay it back down again. You can do it many times without damage.
It’s easy to design your own custom wallpapers because you can create a unique pattern just by matching different colors and designs of tiles. This gives the creativity in decorating choices that more expensive wallpaper lacks.
Its adorable because you can change the mind about the floral wallpaper you want whenever you like, without worrying about damage or mess.
Tips for Preparing Your Walls For Floral Peel And Stick Wallpaper-
How sturdy is the walls
Find out how sturdy your wall is before you begin! Push on your wall about 6 inches from the corner. If it gives way with little effort, then you have a sheetrocked wall, which means that installing peel and stick wallpaper is not going to work! If you are unsure, use a stud finder before getting the wallpaper.
Avoid Chalky Paints
Chalky paints are not your friends. They will cause adhesion problems, so any chalky or grainy surfaces should be sanded down with fine grit sandpaper. You will have to glue on some brown paper and use a roller to sand down the surface.
Use a sealer
Even if you don’t want to cover a different type of wallpaper on the wall, it is recommended that you use a sealer first and let that dry completely. This will ensure that the paper will stick to the wall.
Are the walls clean?
Make sure that your walls are clean before installing any type of paper on them! If there is any dirt, dust, grease (from cooking and making out with your lover *cough cough*) it will affect how well your wallpaper sticks to the wall, and you might find bubbles or creases in the paper.
Primer
Make sure that your walls are primed before applying floral wallpaper! You typically do not have to prime your walls if you are using something like peel and stick tiles–but anything else is best “primed” with a fresh coat of primer before installing. If you find bubbles, creases, or any other imperfections in the paper, you can use a hair dryer to heat up any creases or bubbles and smooth them out with your hands.
Avoid lights near the wallpaper
Make sure that there are no lights near your wallpaper! The glue on most papers will melt if it is too hot, so only install the wallpaper in rooms where you have adequate lighting. If you are having an event like a wedding or graduation party and want to cover up all the lights in your house, get blackout paper!
Avoid Gunk
Try not to install anything on top of the wallpaper that would leave behind gunk. This includes things like oil paintings, candles, and chandeliers–messy stuff. If you are using tiles, install them near the edge of the wall so that they do not extend to the ceiling or floor.
Follow all application instructions!
These vary depending on the brand of paper you purchase, so make sure that you read your instructions thoroughly. If you aren’t sure whether or not your wallpaper needs a primer, read the instructions.
Make sure there’s no paper on the wall
If you are using floral peel and stick wallpaper, make sure that there is no other paper on top of it. It will not adhere well if there is another type of paper directly under the floral sheet rock, so remove all papers before installing.
Dealing with moisture
Moisture from steamers and cleaning will cause the floral paper to detach from the wall, so make sure that you let your room dry before steaming or wiping down any surfaces with a clean cloth!
Panelling
Paneling does not need to be removed before installing wallpaper. If you are using peel and stick tile paper, you can install it right over the paneling in your room.
Removing an older type of wallpaper from the walls
When you want to remove any type of wallpaper, fill a spray bottle with water and lightly mist the glue on the wall. It will become moist when sprayed.